Taming the Empire
With the grail knights subdued, the Tomb King Grim turned his attention to his other not-yet-dead northern neighbor. Reports of a new human settlement on the northwest border of his mountain kingdom required swift action. It is March in the third campaign year, and the snows have melted enough for Grim's Hordes to sweep down and tame the Empire soldiers living there. Summoning his host, Grim began the long march to the northwest. It would be another glorious night for the Undead.
This battle pits the Undead Hordes of Grim against the Khargan Field Marshal Soluspax Pilum and his brigades of Empire soldiers. It takes places just south of the new human town. In addition to the standard terrain, a point-of-interest, the Andropeon Mine, creates magical items occupies a central location on the battlefield. The Undead set up on the southern edge of the map, the Empire set up along the northern edge. The Undead breakpoint is 12. The Empire breakpoint is 11.
The intial setup of terrain and troops gave an immediate advantage to the Undead. The Empire army was effectively divided into two by a large swamp in the center of the battlefield. A lone brigade of knights was positioned to advance the Empire western flank. The hardest hitting Empire units, the dragon ogres and flagellants, were religated to trying to punch through a narrow gap between the swamp and a heavy forest. The fearsome canons and hellblasters were deployed at the extreme eastern flank while the bulk of the Empire footmen were positioned to march into the eastern flank of the Undead army. The Undead strategy was simple. Both chariot/cavalry brigades would swing to the west to engage the knights. This clear advantage for the Undead would be the key to winning the day. The narrow gap could be held by a few units of bowmen and skeletons. Both the western battlefield and the gap could be covered by a strategically placed skull chukka brigade in the center of the board. The eastern battlefield strategy would be to position bowmen on the hill and nearby forest and force the Empire to attack into defended positions. This effectively removed the Empire artillery, dragon ogres, and flagellants from the game.
The first turn saw troop advancements from both sides. Of key importance, the skull chukkas were able to confuse the dragon ogres, who effectively blocked the gap for the Empire. The Empire knights made good first turn progress, as did the Undead bowmen. Of great concern was the failure of the Undead to command either the second chariot/cavalry brigade or the carrion birds. No blood was drawn, but the advantage was clearly on the side of the Undead (0-0).
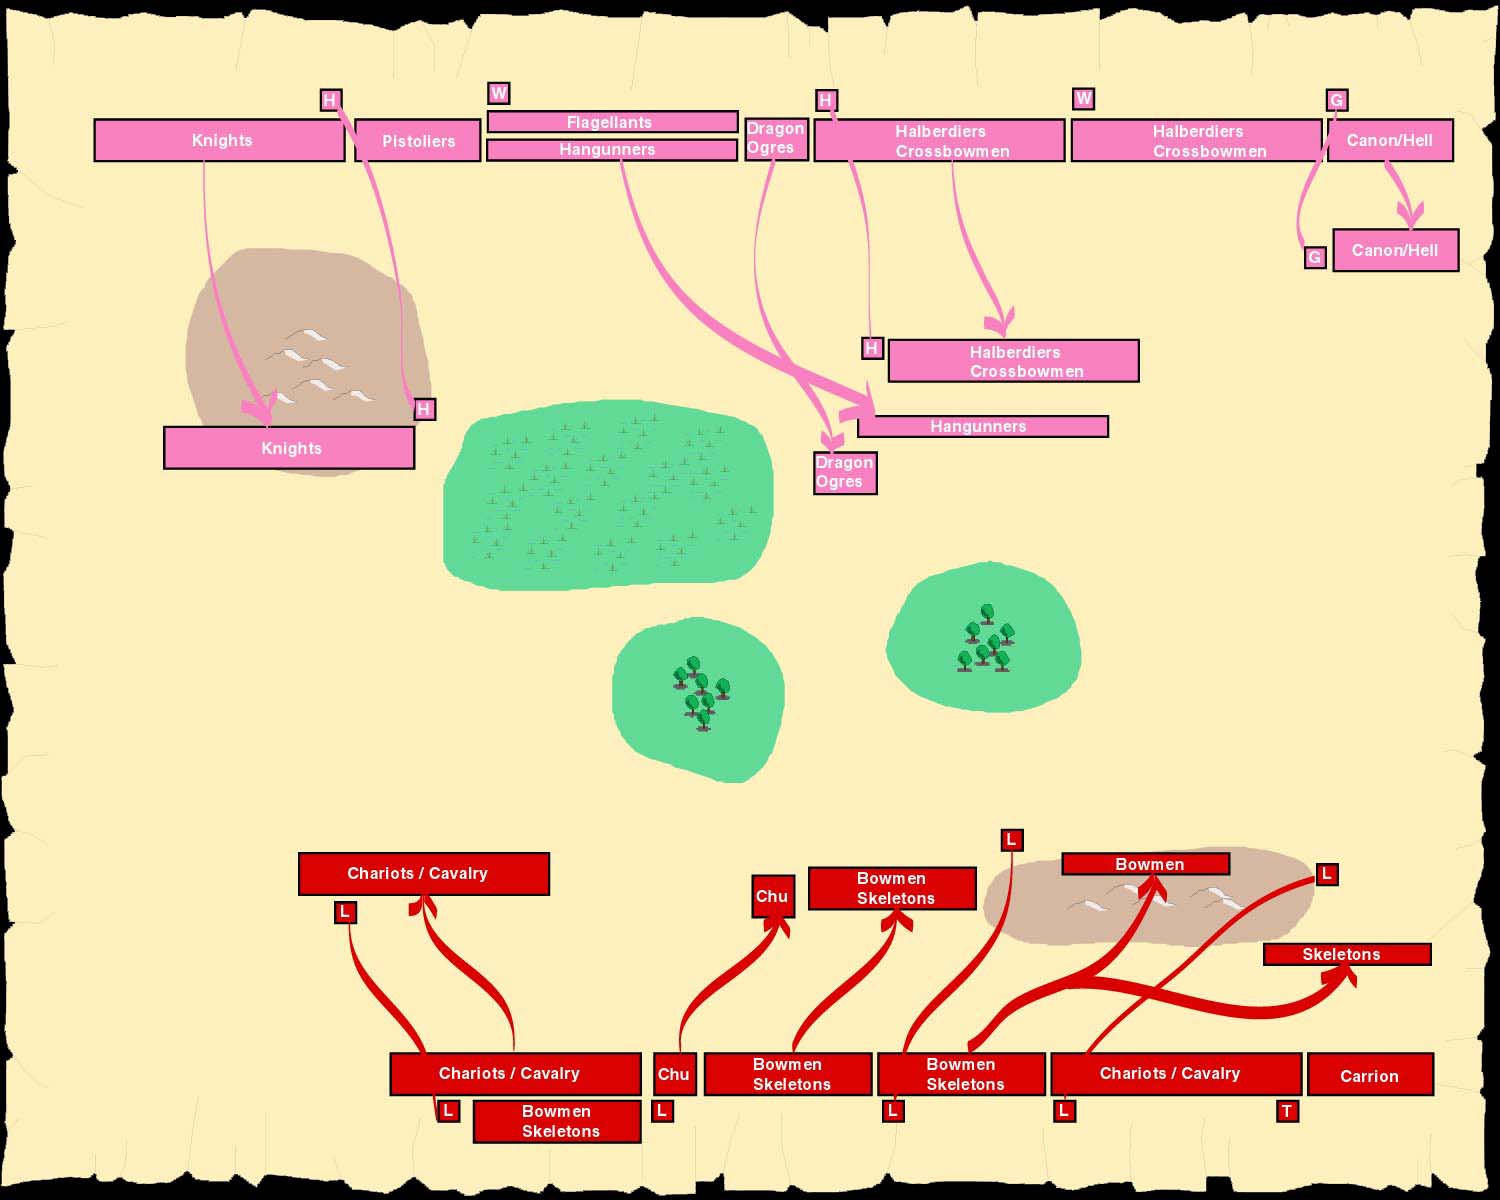
Figure 1: Battle Turn 1
The second turn saw the advancement of the Undead skeleton and bowmen in the western flank. While the distant chariot/cavalry brigade made progress towards the battle, the other brigade failed its command roll and was unable to engage. While the gap was effectively blocked by two units of bowmen tucked into the forest and the skull chukka shooting between the forests, the eastern flank failed to take the forest, settling for an inferior position on the hill. The Empire made excellent progress, moving their foot soldiers into position in the east. However, the knights were outside of initiative range, and their commander failed to move the troops via orders. The flagellants moved up to attempt to skirt around the dragon ogres and charge the gap. No casualties from shooting, but the Undead advantage wouldn't last much longer (0-0).
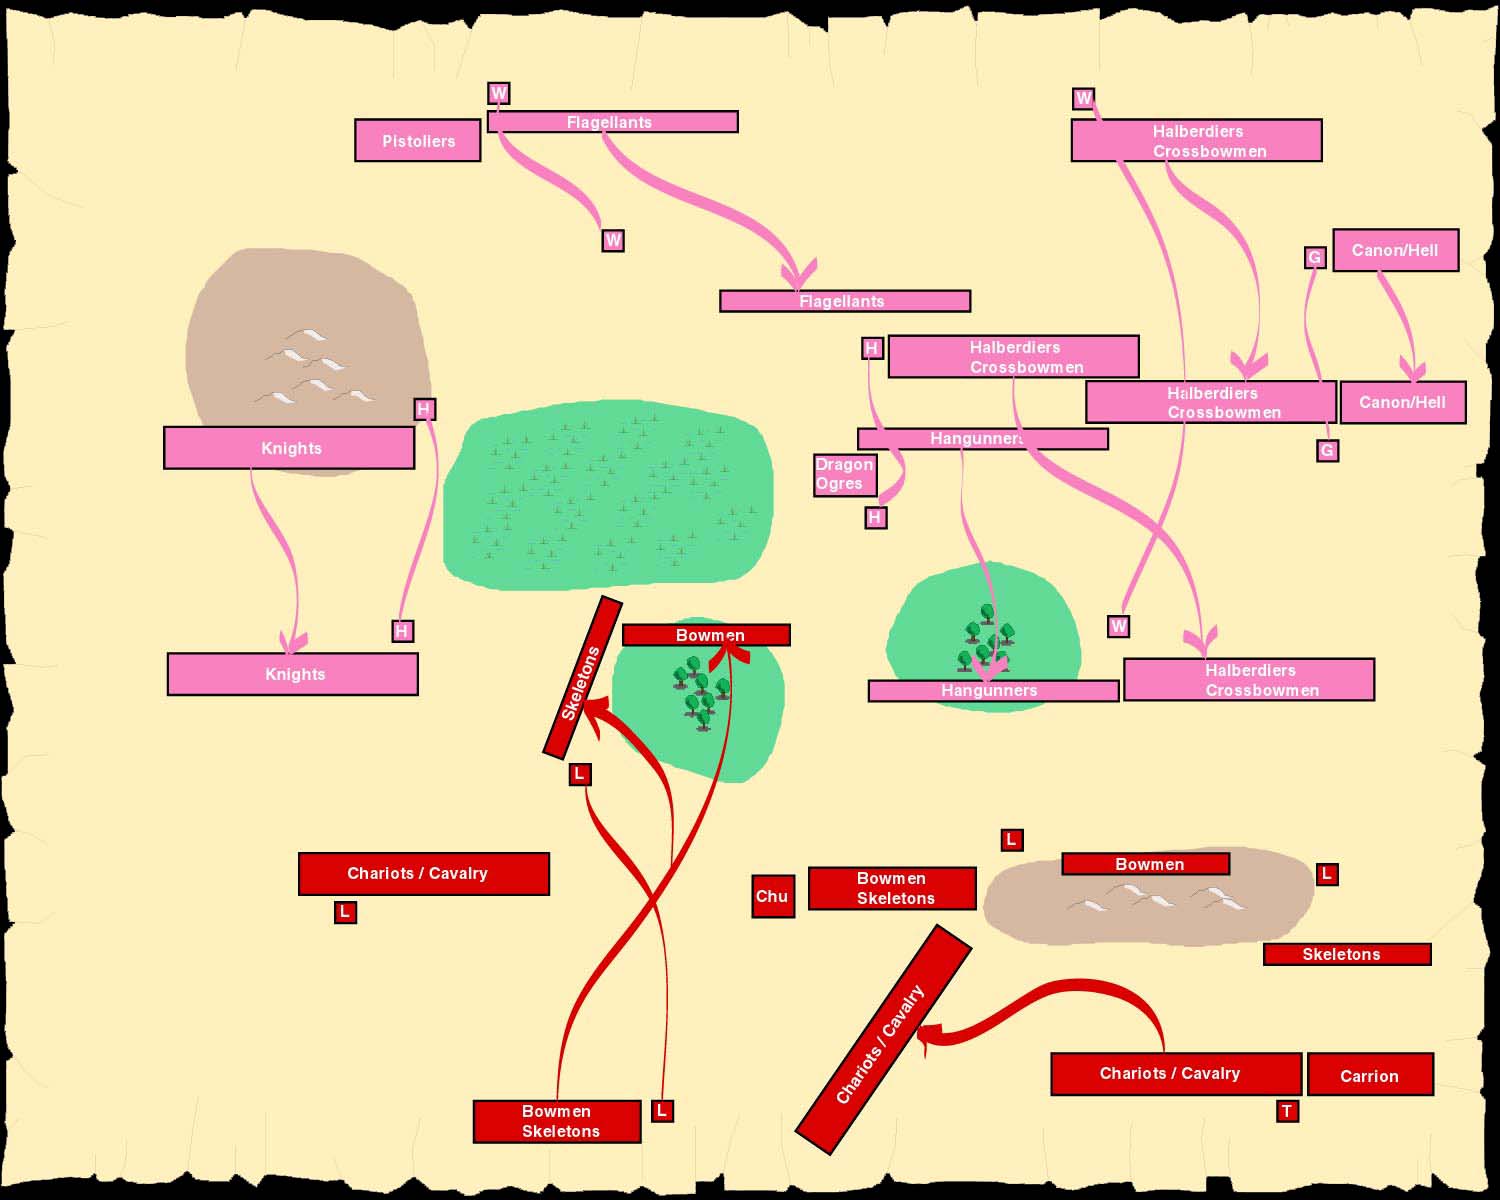
Figure 2: Battle Turn 2
The third turn was again marked by the inability of either the Undead or Empire to engage on the western flank. However, the second Undead chariot/cavalry unit moved into place with the help of the Orb of Majesty. With ten units against four, the Empire knights were doomed. The flagellants engaged the bowmen in the gap without success while Doom and Despair kept the dragon ogres at bay. Two aggressive moves by the Undead, a foot soldier charge into the defended Empire handgunners and a carrion attack into the western flank of the Empire foot soldiers were both unsuccessful, costing the Undead two units of bowmen and a unit of skeletons. Several Empire stands were destroyed, but the Undead were forced to retreat. The Empire did not pursue. While they held the advantage in troops, the imminent demise of the Empire knights was sure to swing the battle (1-3).
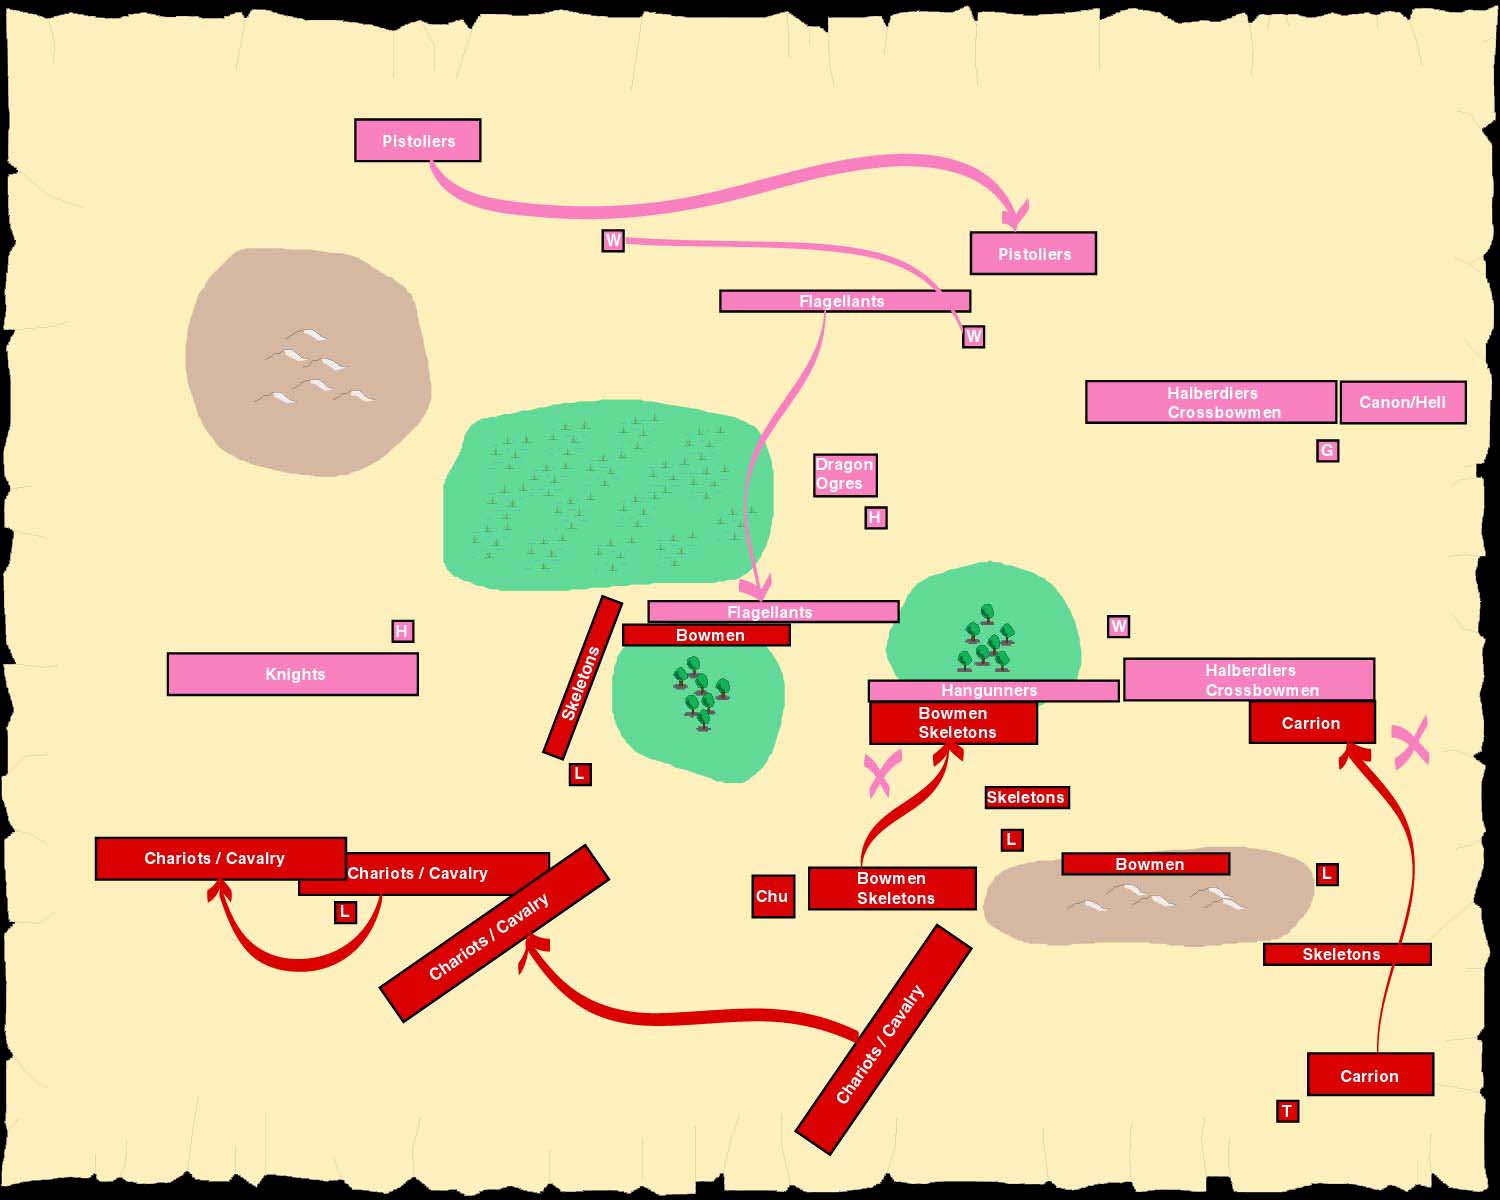
Figure 3: Battle Turn 3
The fourth turn was the decisive one of the battle. One Undead chariot/cavalry brigade slammed into the front of the knights, two units of skeletons advanced into the knight's flank, and a sucessful Raise Dead spell brought up a unit of skeletons behind the knights. Passing through the hero caused the character to attach to the brigade of knights. Although the odds were stacked, the battle was narrowly won by the Undead. Without a path to retreat, the entire Empire brigade was lost. Another successful Raise Dead spell along with the advancement of the remaining skeletons on the eastern flank managed to stop the Empire advancement in that direction. One unit of skeletons was lost. Three units of crossbowmen and halberdiers were destroyed (8-4).
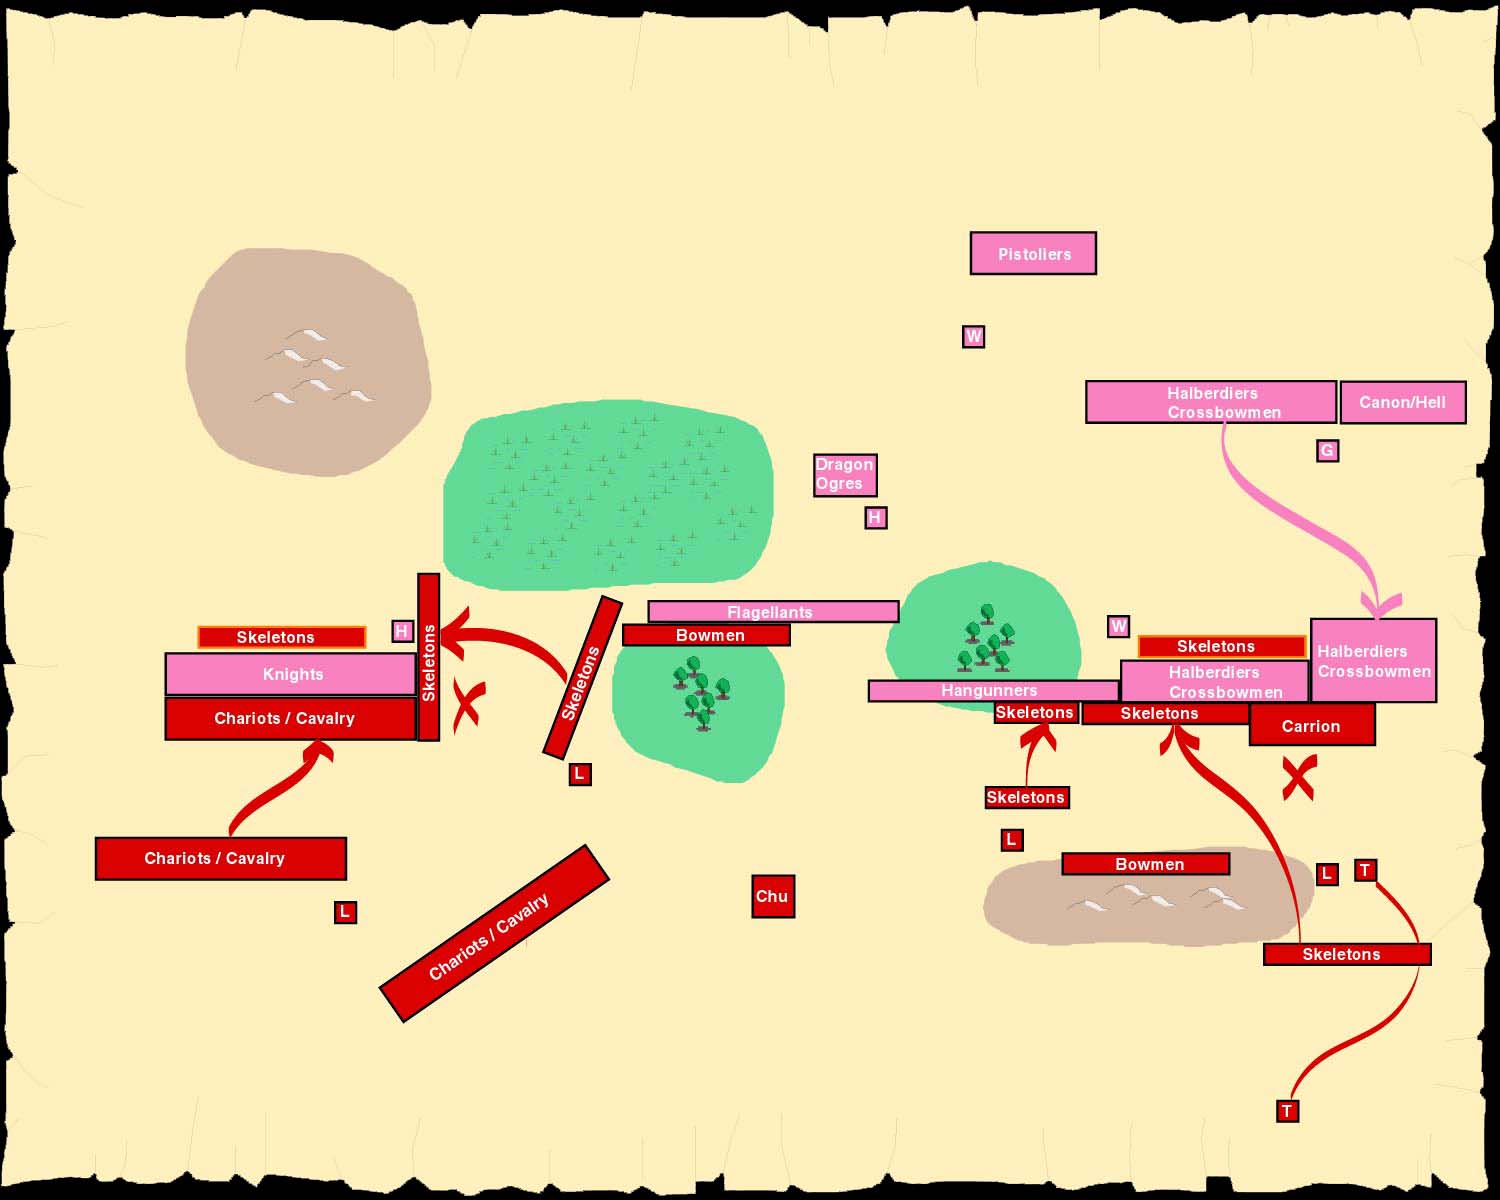
Figure 4: Battle Turn 4
While not yet at their breakpoint, the Empire retreated from the field of battle. Grim's army stopped on the field to replenish its lost comrades. The final point totals were 720 to 130 in favor of the Undead. This battle occurred on June 20, 2002 between Bruce Lehman (Empire) and Chris Matney (Undead).
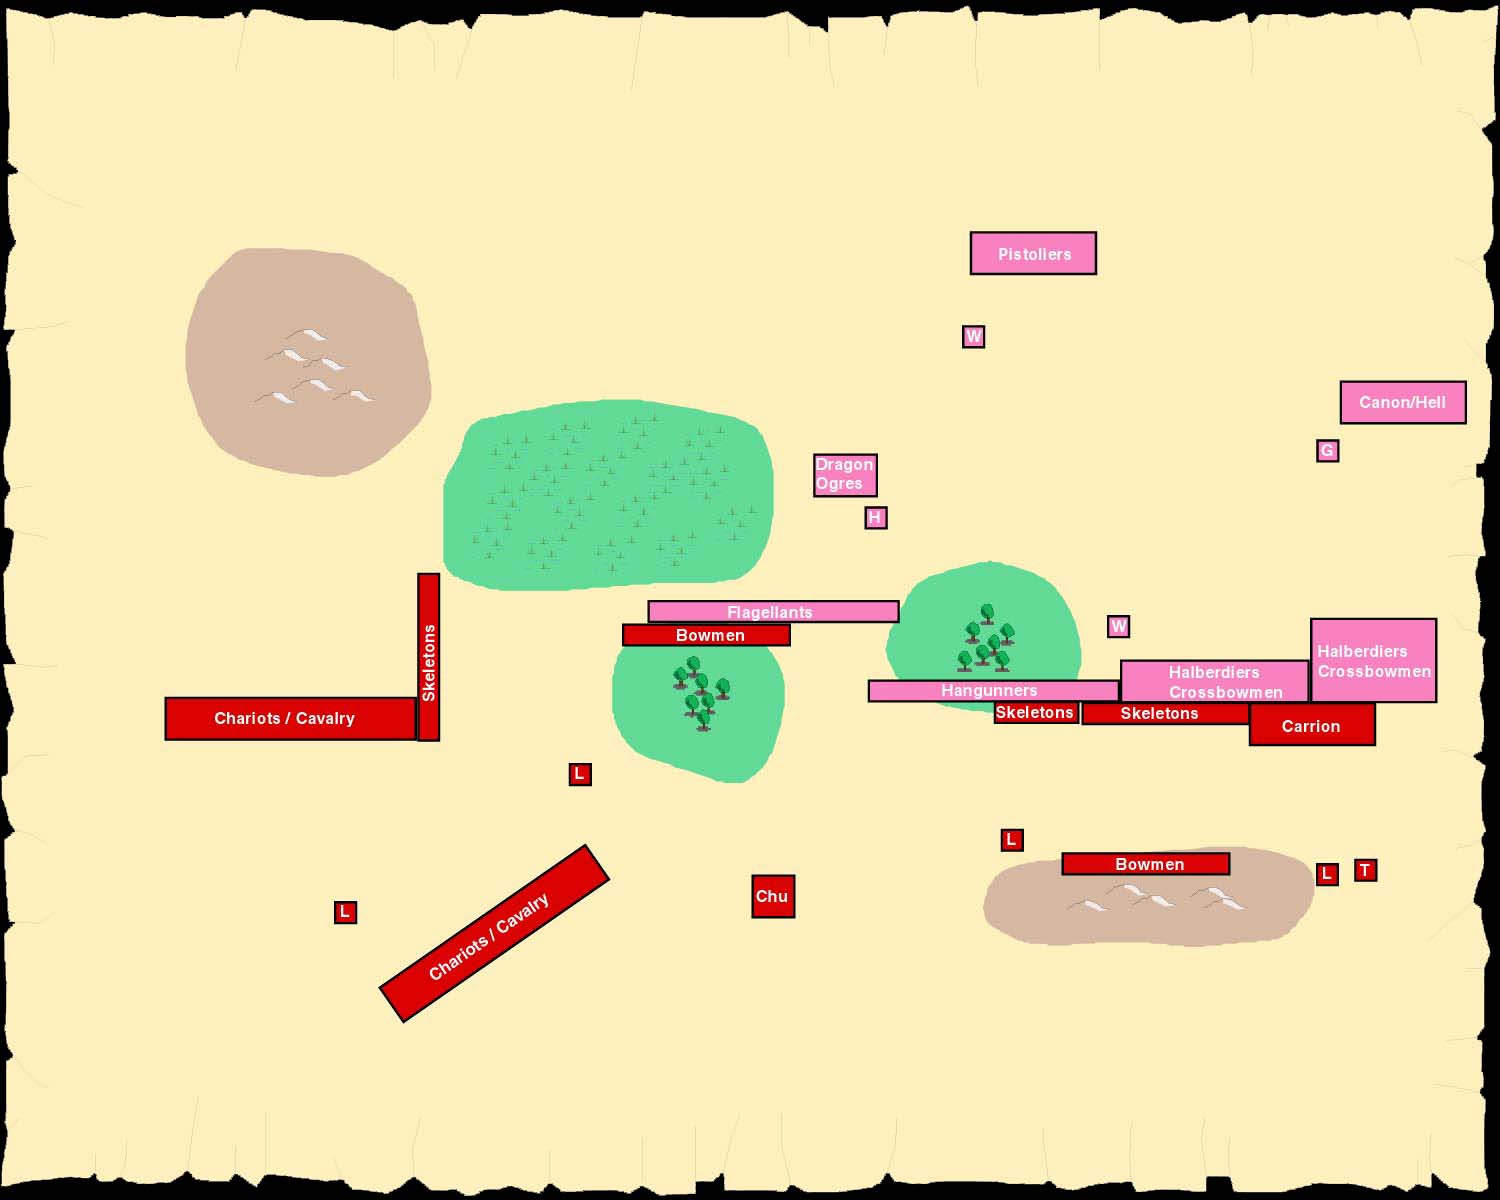
Figure 5: Battle Final Positions